If you’ve ever tried to focus on stars with a Sony camera, you know the problem… your screen is black, autofocus won’t lock on anything, and you end up taking test shot after test shot hoping you got it right. There are two shortcuts I highly recommend for any Sony shooter photographing the night sky: Bright Monitoring and Focus Magnifier. I have them set to C1 and C2 on top of my camera.
I filmed this video while scouting locations for one of my night photography workshops, using my new go-to kit: the Sony a1 II and the 28-70mm f/2 GM.
Bright Monitoring: See Your Scene in the Dark
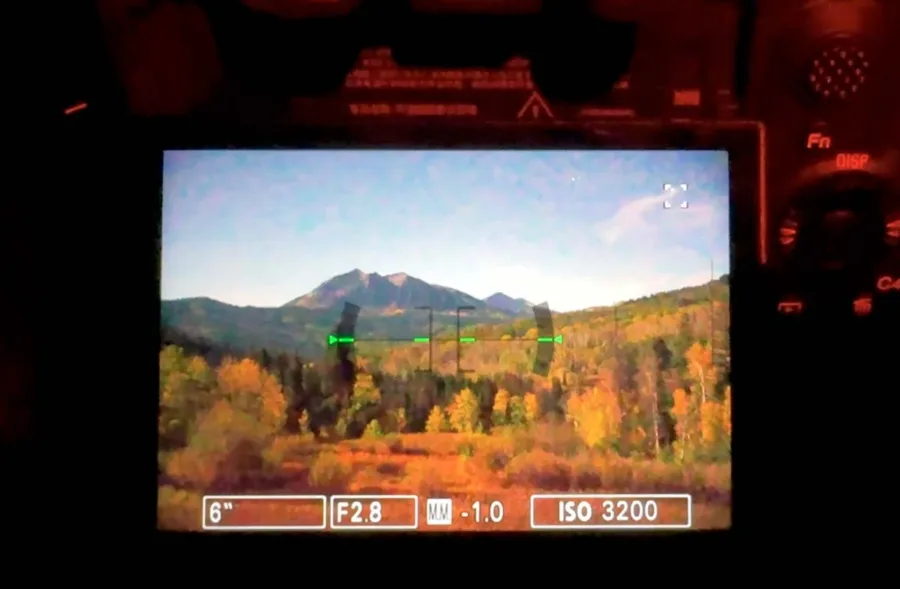
Here’s a typical night scene… 6 seconds, f/2.8, ISO 3200. I had a lot of moonlight, and my screen was still almost black.
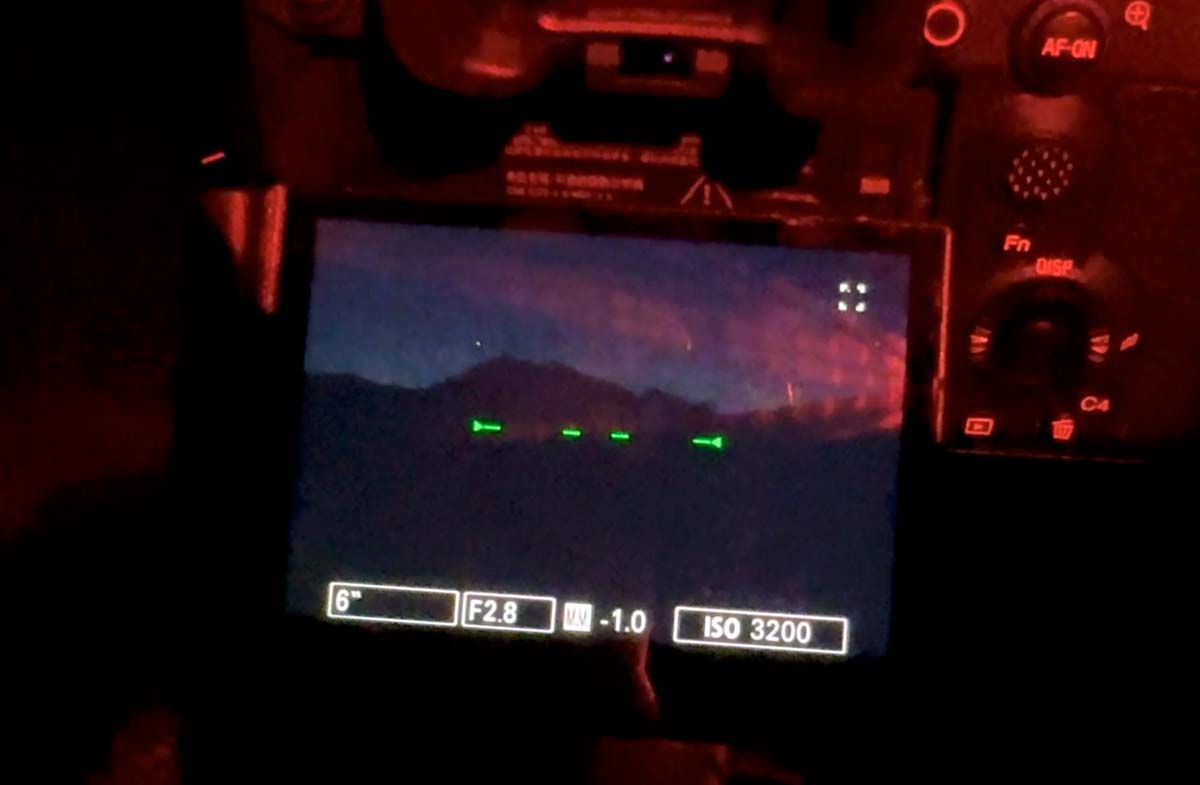
Now look what happens when I press C1. Bright Monitoring turns a night image into day by extending the live-view exposure so I can see details that were almost completely hidden. I actually saw the galactic core in perfect detail when I used this the other night. Even with moonlight helping light up the scene, it still makes a huge difference.
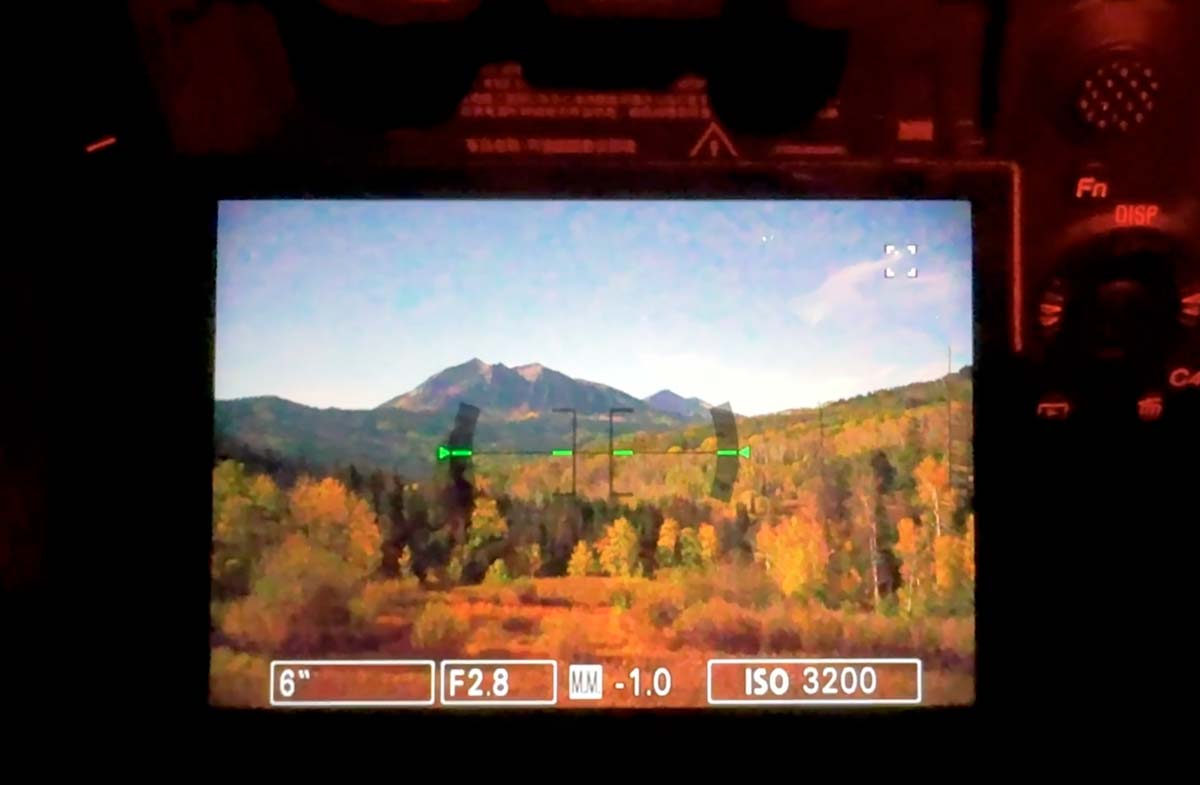
It only brightens what you see on the screen. In Manual mode, your photo is still taken at your own settings.
Focus Magnifier: Zoom In and Focus on a Star
With Bright Monitoring still on, I press C2 to bring up Focus Magnifier. Use the multi-selector to move the box over a bright star, then press C2 again to increase the magnification. On the a1 II, I start at 4.2x and press the button again when I need a closer look.
Because Bright Monitoring is still on, you’re seeing the stars live. Turn your focus ring until the star is as small and sharp as you can get it. In the video, my star was drifting through a cloud and I could still dial it in. The live updates are super helpful compared to taking a test shot and zooming in on the back of the camera.
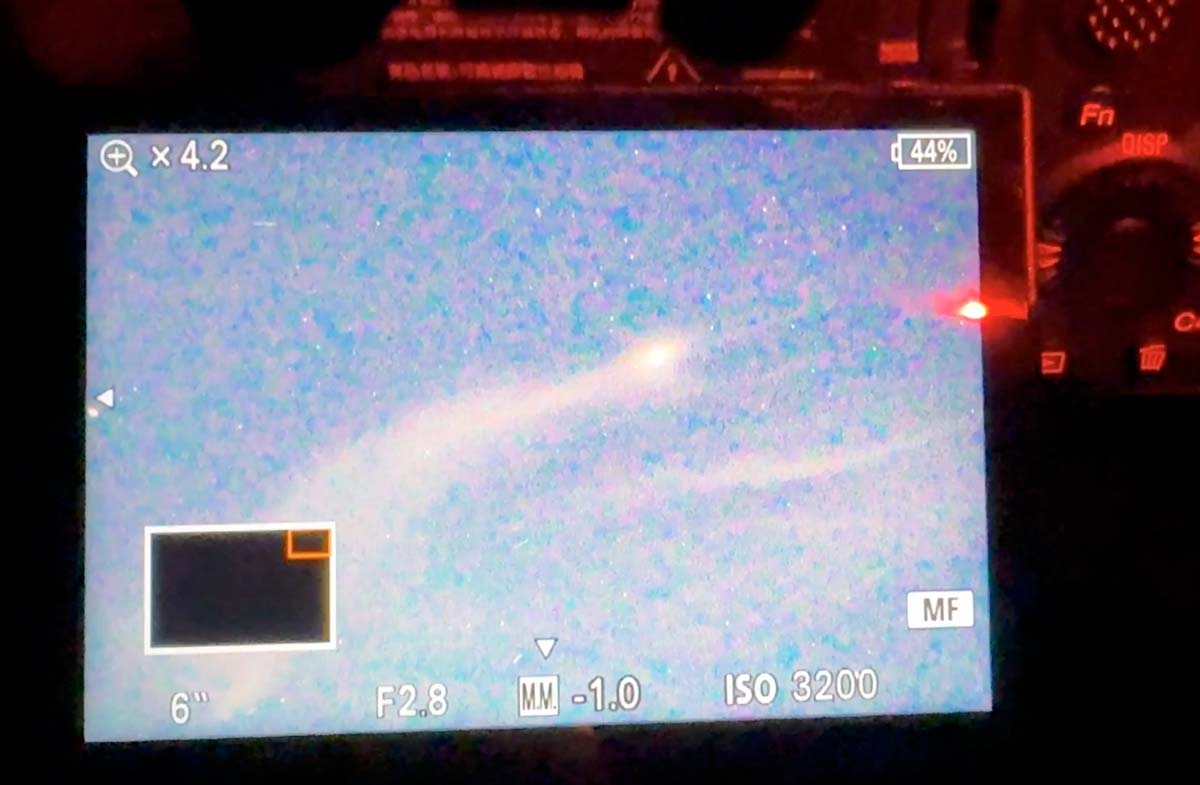
The order matters. Turn on Bright Monitoring first, then Focus Magnifier. The camera won’t let you turn Bright Monitoring on or off while Focus Magnifier is open.
Focusing in the dark is the #1 thing my students struggle with. At my workshops I’ll walk you through it on your own camera and lens, in the field.
See Upcoming Workshops →How to Add These Shortcuts to Your Sony
These menu paths are from Sony’s newer menu system, which is on the a1 II, a1, a7 IV, a7R V, a7C II, a6700 and other recent bodies. Older cameras have the same features with slightly different menus.
Assign Them to Custom Buttons
- Go to MENU → Setup → Operation Customize → Custom Key/Dial Set.
- Page through to the buttons you want to use. On the a1 II, C1 and C2 are on the Top page (3/6).
- Select C1 and set it to Bright Monitoring.
- Select C2 and set it to Focus Magnifier.
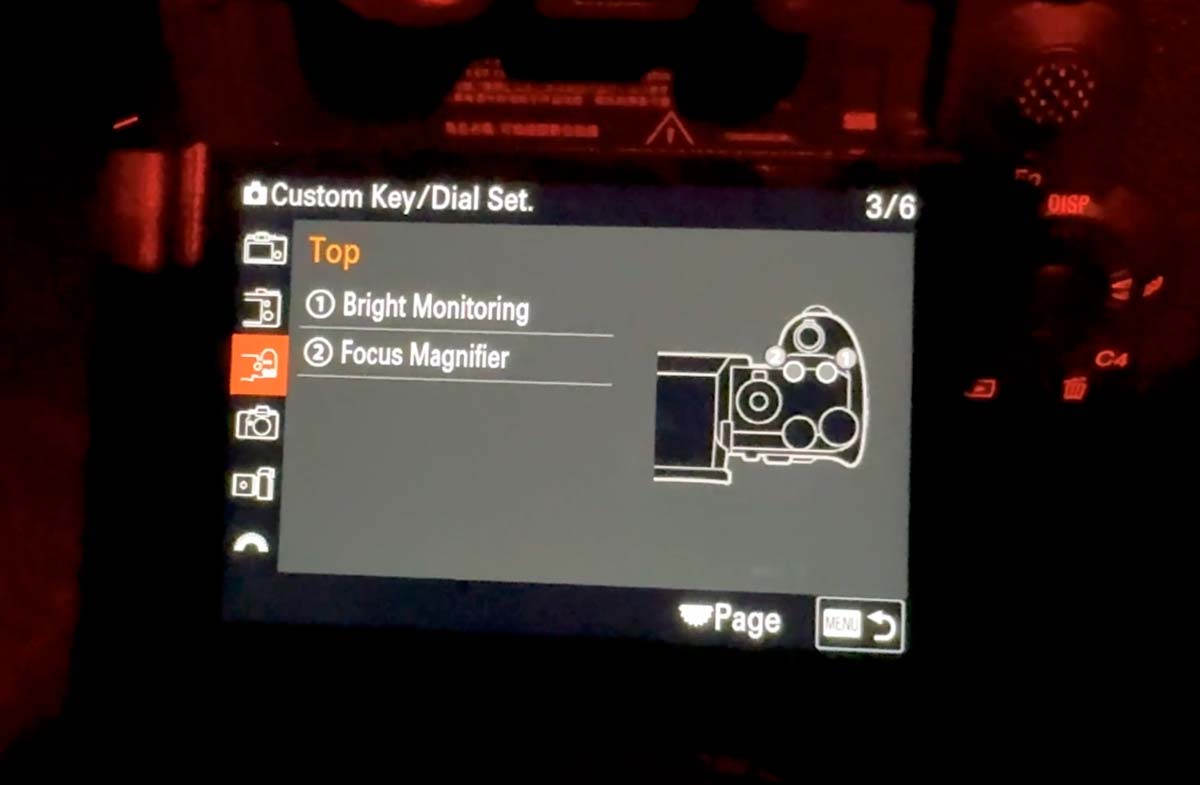
I use C1 and C2 because I can find them by feel in the dark. Use whatever buttons work for you. Bright Monitoring isn’t in the main menu, so a custom button is the only way to use it.
Using Sony’s Older Menu System
On older Sony cameras, go to MENU → Camera Settings 2 → Custom Key or Custom Key (Shoot) *On some of the oldest bodies, it’s under Custom Settings instead. Select the button you want to change, then assign Bright Monitoring or Focus Magnifier from the available functions. If Bright Monitoring does not appear in the list, your camera may not support it.
Adding Focus Magnifier to My Menu
If you’d rather not use a button for Focus Magnifier, it’s in the main menu at MENU → Focus → Focus Assistant → Focus Magnifier. To keep it handy, go to MENU → My Menu → My Menu Setting → Add Item and add it from the list.
Before You Head Out
- Put your camera in manual focus. Bright Monitoring only works in MF, and it turns off if you switch focus modes.
- Shoot in P, A, S or M. Bright Monitoring also turns off when you power down, so just press the button again.
- While it’s on, the screen won’t show exposure changes and it can refresh slower. That’s normal.
Focusing on Stars With a Sony: FAQ
What is the best way to focus on stars with a Sony camera?
Switch to manual focus, turn on Bright Monitoring so you can see the scene, then use Focus Magnifier to zoom in on a bright star. Turn the focus ring until the star is as small and sharp as possible.
Why won’t Bright Monitoring turn on?
Check three things: you’re in manual focus, you’re in P, A, S or M, and Focus Magnifier isn’t already open.
Can I add Bright Monitoring to My Menu?
No. Bright Monitoring can only be assigned to a custom button. Focus Magnifier can be added to My Menu.
Can I just set my lens to infinity?
Most Sony lenses don’t have a printed infinity mark, and turning the ring all the way doesn’t mean you’re at true infinity. Zooming in on a star is the most reliable method. I also teach a few backup tricks for nights when there’s no bright star to focus on, which we practice during my astrophotography workshops.
Take These Skills Into the Field
My workshops are small groups of 6-8, so you get real time with me in the field. We set up your camera before sunset, then spend the night composing, focusing and shooting under dark skies, with post-processing sessions to finish your images.